Skip to content

Manage compute projects

Restricted functionality

This functionality can only be accessed when having one of the following roles:
  • OWNER
  • CLUSTER_ADMIN
  • ALLOCATION_BOARD_CHAIR
  • ALLOCATION_BOARD_DELEGATE

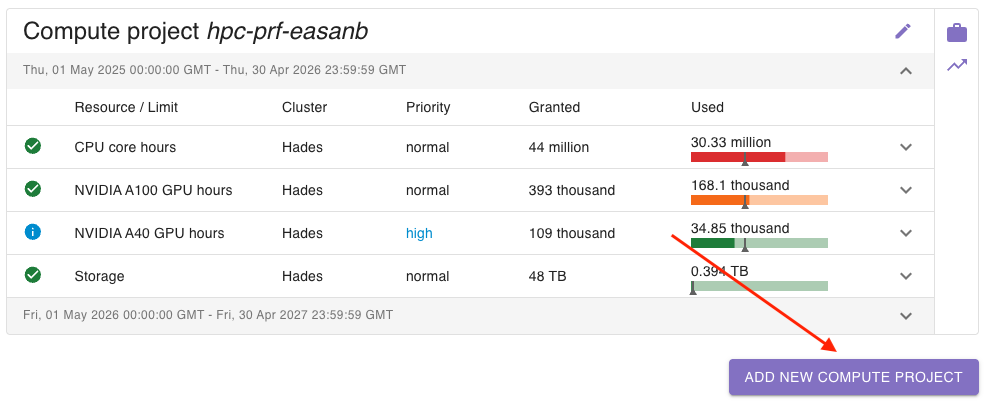
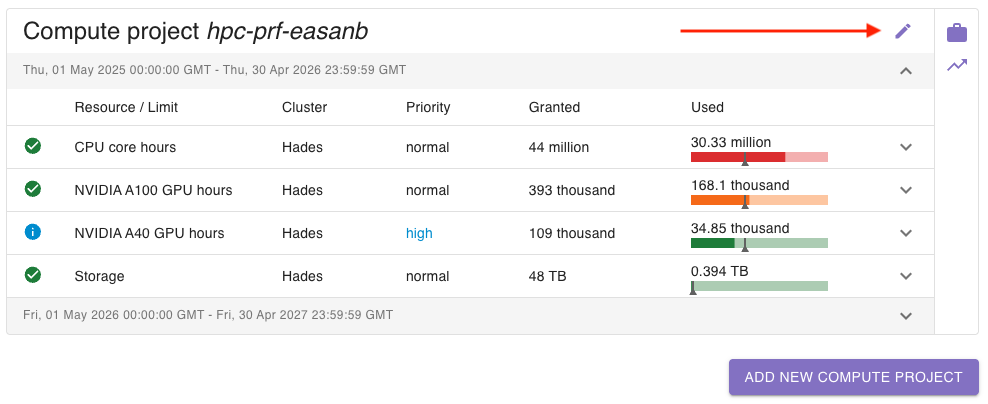
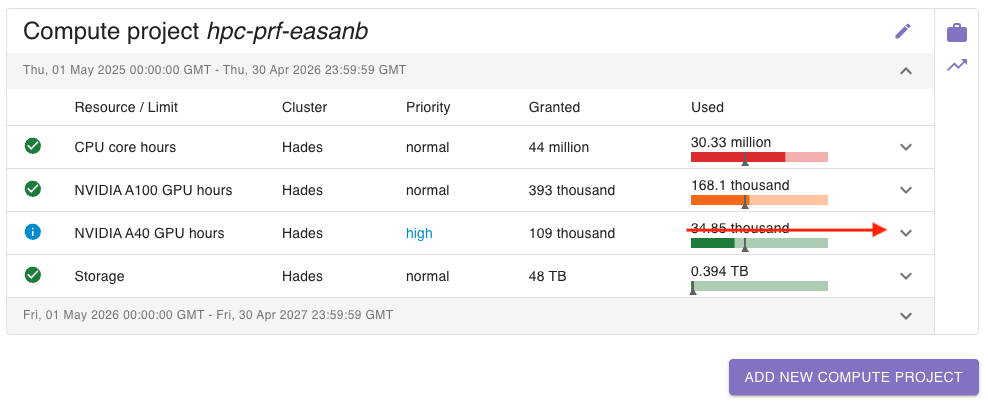
To create a new compute project, go to the project’s detail view and click on add new compute project:

Screenshot of add button

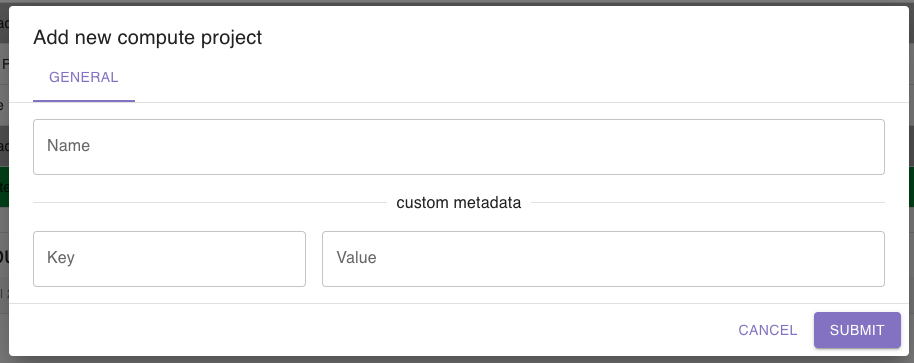
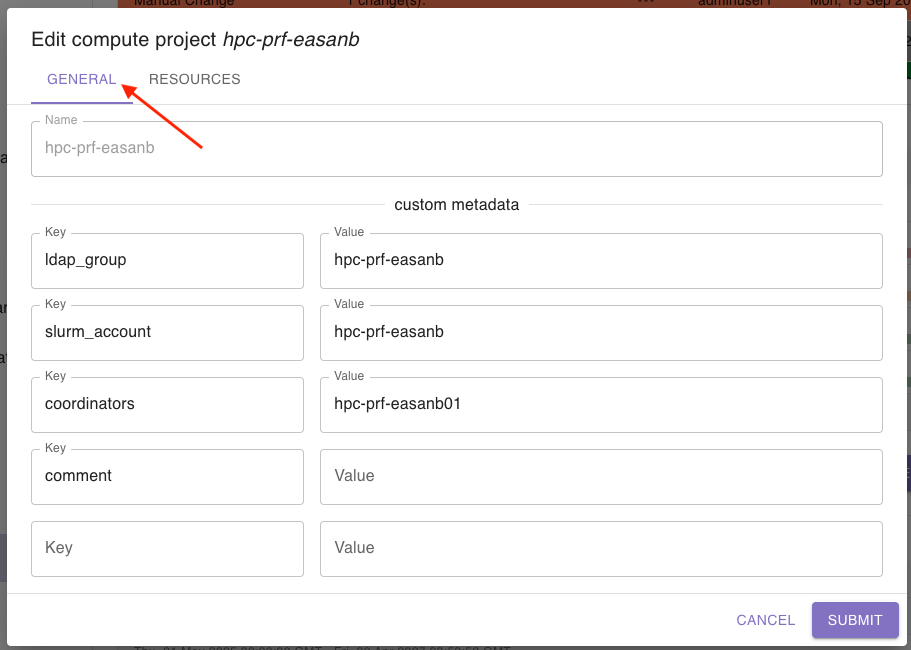
A dialog will open where you can set a name for the compute project.

Add dialog

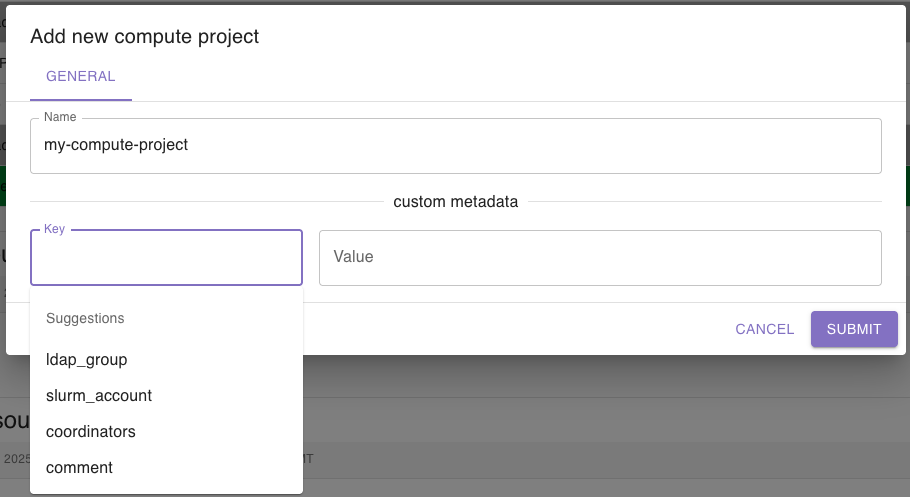
Additionally, you can add custom metadata as key value pairs which will be saved to the compute project. You will receive suggestions for the keys based on other compute projects’ keys:

Add custom meta data

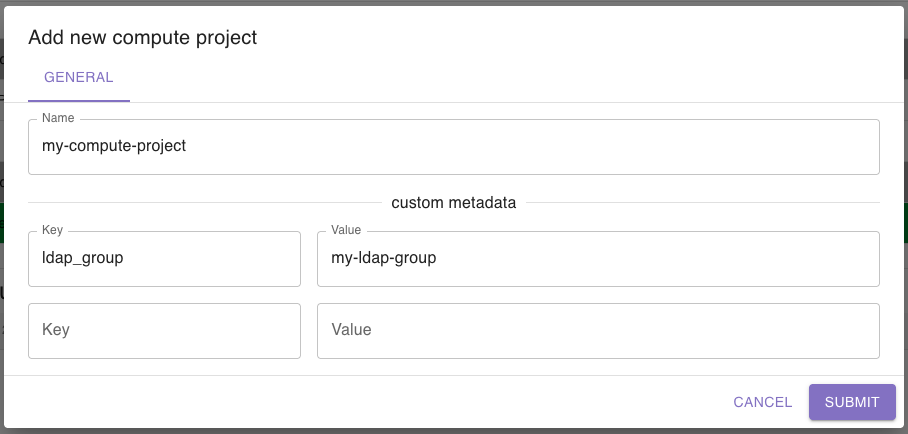
When you add a key, another row for a new key value pair will appear so that you can enter as many as you want:

New line for custom meta data

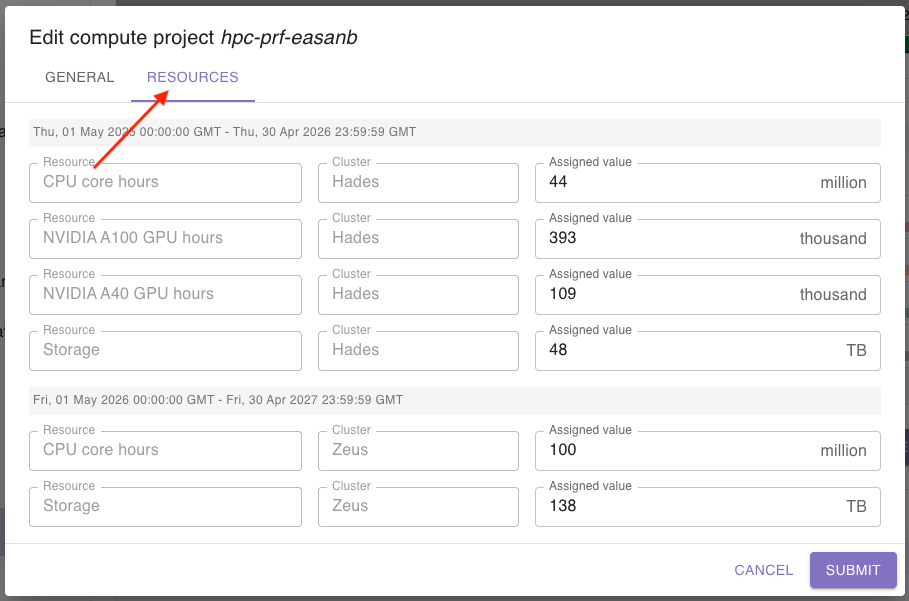
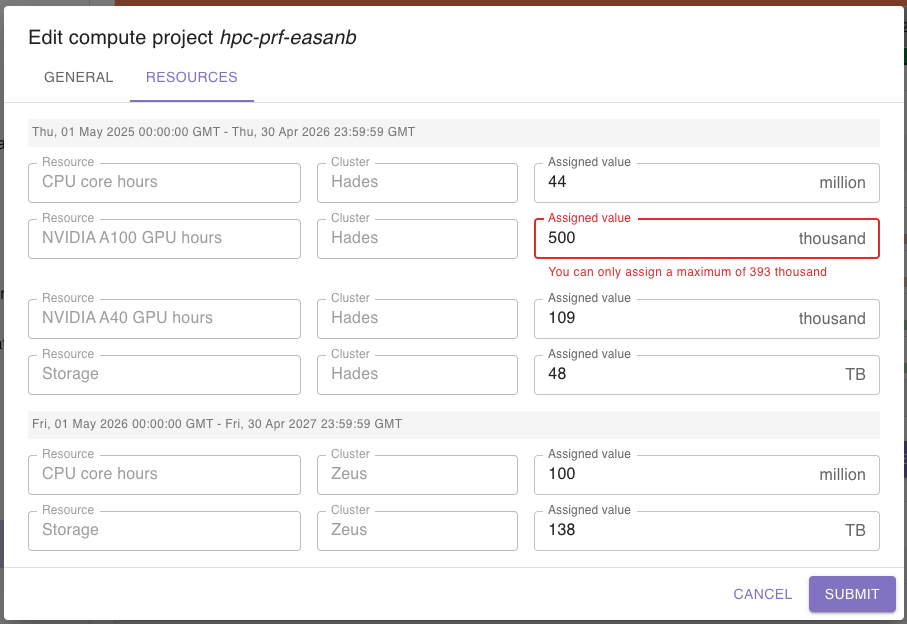
Save the compute project by clicking the submit button. After that, you can edit the compute project to add resources.

To edit a compute project, click on the edit button in the top right corner of the compute project:

Screenshot of edit button

A dialog will open where you can edit the compute project. To edit general information, go to the tab general:

General tab

To edit the related resources, go to the tab resources:

Resources tab

Here you can edit the amount of granted resources which will be linked to the compute project:

Assign less than granted Assign more than granted

Save your changes by clicking the submit button.

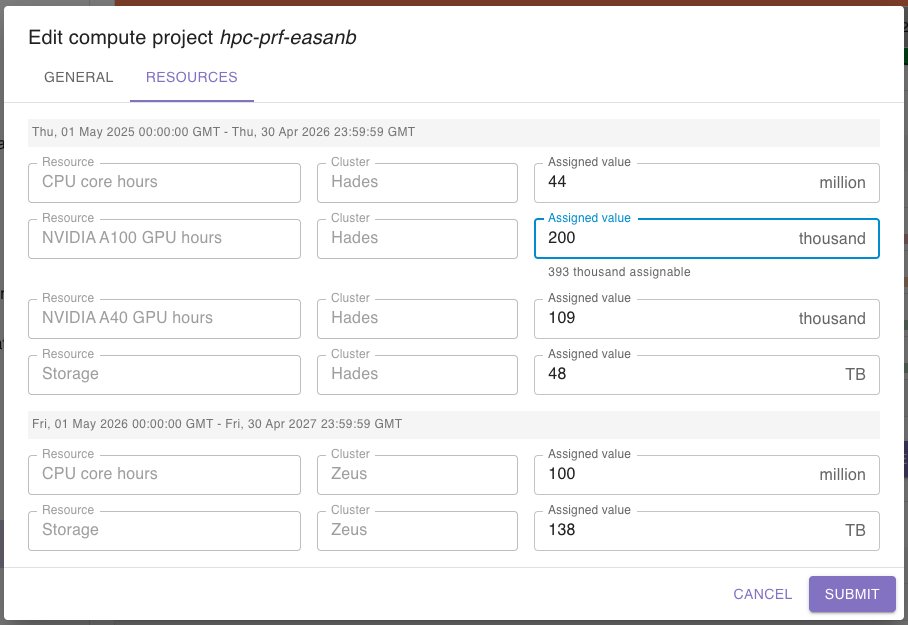
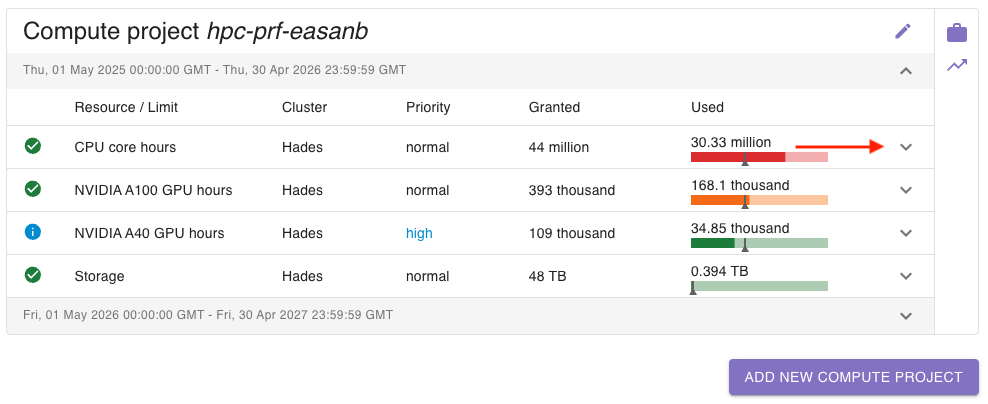
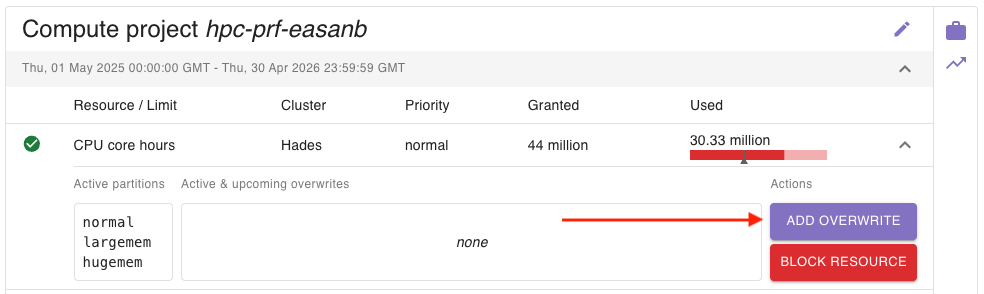
To block a resource (e.g. to stop a compute project to be able to access this resource), click on the arrow on the right side:

Assign more than granted

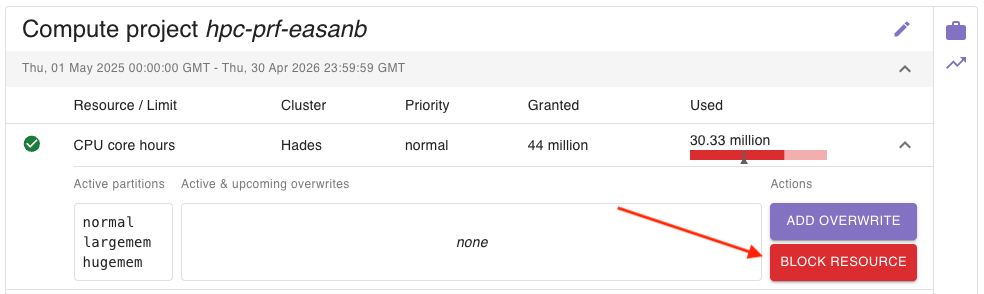
Here you can click on block resource to block it:

Assign more than granted

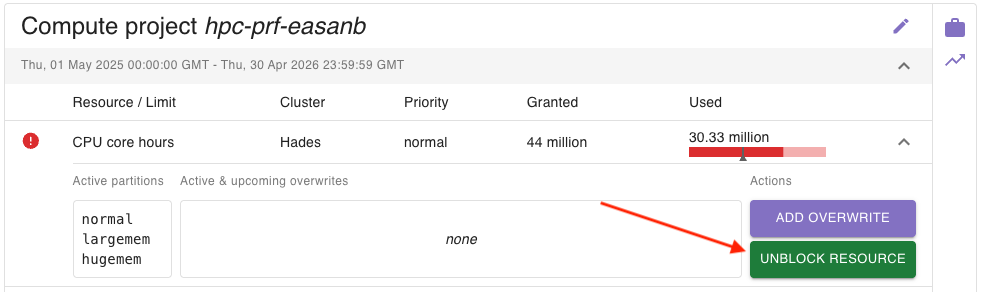
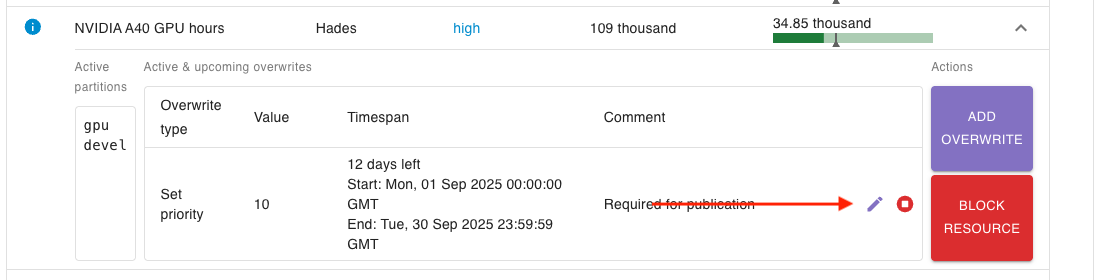
You will see that the icon on the left side will change, indicating that the resource has been blocked. To unblock it, simply click on unblock resource:

Assign more than granted

To add a new resource overwrite, click on the arrow on the right side:

Add overwrite step 1

Then, click on the add overwrite button on the right side:

Add overwrite button

A dialog will open, where you can add the time period, the overwrite type, the corresponding value and a comment to the new resource overwrite:

Add dialog

Learn more about the available overwrite types and their effects here.

To edit a resource overwrite, click on the arrow on the right side:

Edit overwrite step 1

Then, find the resource overwrite you want to edit and click on the edit button on the right side:

Edit button

A dialog will open where you can edit all the relevant information:

Edit dialog

Save your changes by clicking the submit button.